Savory Cheesy Baked Chicken & Rice Casserole Delight!
 ⭐ Reader Favorite 2026
🍗 One Dish · 50 Min · 6 Servings
⭐ Reader Favorite 2026
🍗 One Dish · 50 Min · 6 ServingsCheesy Baked Chicken Rice — The One-Dish Comfort Dinner That Earns a Standing Ovation Every Single Time
Let’s paint a picture. It’s a Tuesday. You’re tired. Your family is hungry and someone just asked “what’s for dinner?” for the third time in ten minutes. You need something that feels like a warm hug on a plate — cheesy, satisfying, real — but you do not have the emotional bandwidth to make something complicated.
This is exactly the moment Cheesy Baked Chicken Rice was invented for.
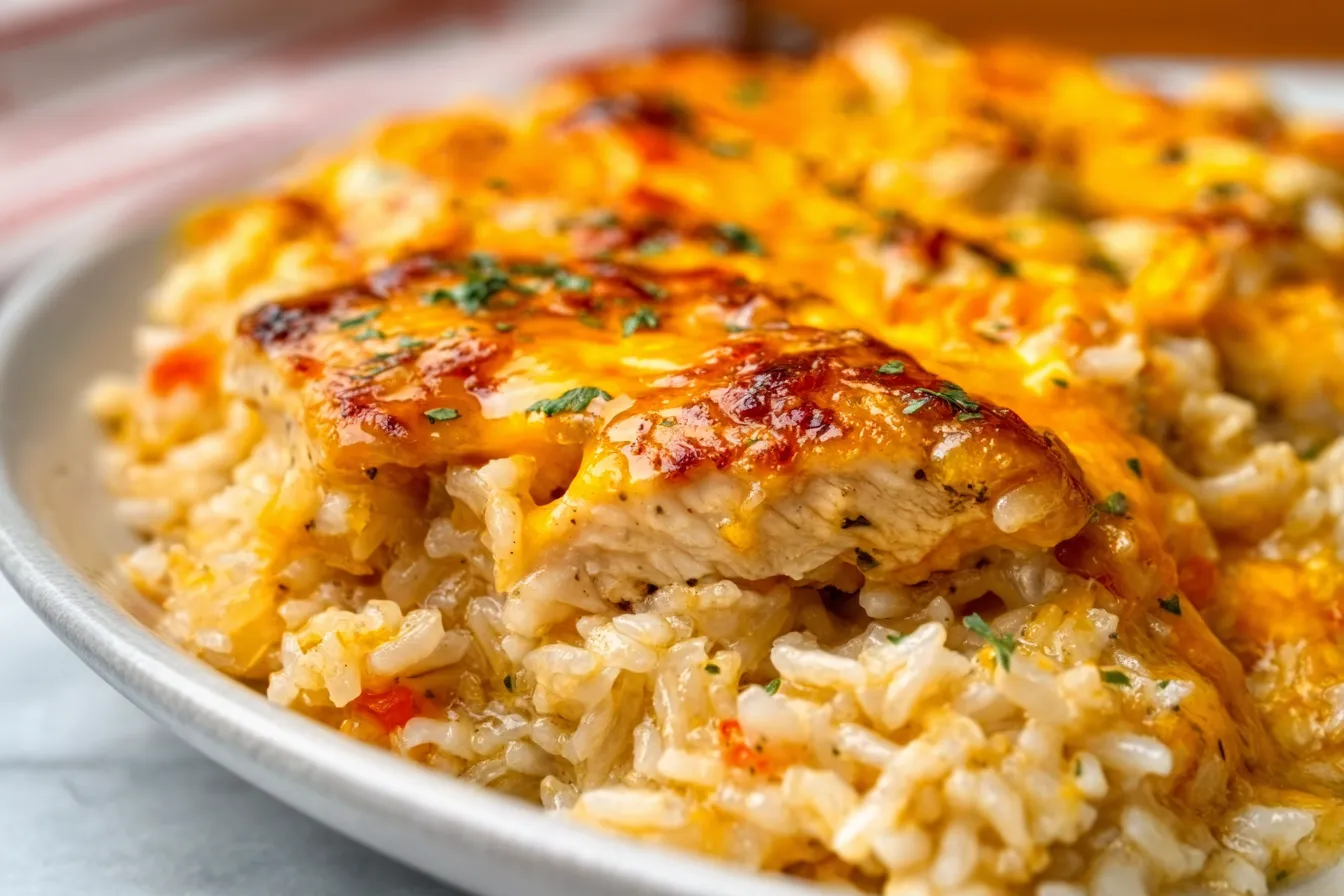
We’re talking about golden, seasoned chicken baked right on top of creamy, perfectly cooked rice that’s been loaded with cheddar and mozzarella until the whole thing looks like a casserole that belongs in a cooking magazine. And yet — it’s shockingly simple. One dish. Minimal prep. The oven does 90% of the work.
I’ve tested this recipe through cold winters, picky-eater dinners, and meal-prep Sundays. I’ve adjusted the rice-to-liquid ratio at least twelve times (you will benefit from every single one of those attempts). I’ve figured out the exact cheese combination that gives you that crispy, pull-worthy crust without getting greasy. And I’m giving you all of it right here, start to finish, no nonsense.
📌 This recipe is a Pinterest save-and-make-tonight type. Pin it to your Easy Family Dinners board before you scroll — you’ll want to come back to this one.
📋 Jump to Section
Why This Cheesy Baked Chicken Rice Recipe Hits Differently
There are approximately 4,000 versions of baked chicken and rice on the internet. So why is this one worth your time? Let me break it down.
The Rice Cooks IN the Sauce — Not Beside It
Most mediocre chicken rice bakes use pre-cooked rice, which either turns into mush or stays weirdly separate from the sauce. In this recipe, uncooked rice goes into a creamy, flavored liquid base and cooks directly in the oven, absorbing every bit of broth, cream, and cheese as it steams under the foil. The result? Rice that tastes like it’s been slow-cooked in a restaurant kitchen for hours.
A Quick Pre-Sear on the Chicken Changes Everything
Yes, it’s one extra step. Yes, it’s worth every second. Searing the chicken for four minutes before it goes in the oven creates a golden, rendered skin and builds the fond on the bottom of the pan — which then flavors the entire rice base when you deglaze. That’s the kind of depth of flavor that makes people ask for your recipe.
The Two-Cheese System
Sharp cheddar goes into the rice — it melts into the base and flavors every single grain. Mozzarella goes on top at the end — it melts into those long, satisfying cheese pulls and browns into a golden crust. Together they cover both flavor and texture. This is not accidental. This is strategy.
Ingredients — And the Secret Role Each One Plays
Quality in = quality out. Here’s exactly what you need and, more importantly, why.
The Chicken
- 6 bone-in, skin-on chicken thighs — Thighs stay juicy through long baking where breasts can dry out. The bone adds flavor to the rice as everything cooks together. Skin-on gives you that golden, crispy topping. If you only have boneless skinless — see the variations section.
The Rice Base
- 1½ cups long-grain white rice, uncooked — Long-grain has lower starch and stays fluffy. Do NOT use instant rice — it will turn to paste. Do not use short-grain either.
- 2¾ cups chicken broth — The extra ¼ cup beyond a standard 2:1 ratio compensates for moisture the cream soup absorbs. This is the ratio I tested twelve times so you don’t have to.
- 1 can cream of chicken soup — This is the binding agent that creates the creamy, cohesive texture. It also adds a savory depth that is, frankly, hard to replicate from scratch without a lot more effort.
- 1 cup sour cream — Provides tang and richness that cuts through the heavy cheese. Don’t substitute with Greek yogurt — it separates under high heat.
- 2 cups sharp cheddar (divided) — Sharp cheddar has the flavor punch to season the entire rice base. Mild cheddar disappears into the background.
- 1 cup shredded mozzarella — Low moisture mozzarella for the top layer. This is your pull-apart crust builder. Fresh mozzarella has too much water.
*As an Amazon Associate, we earn from qualifying purchases at no extra cost to you.
How to Make Cheesy Baked Chicken Rice — Step by Step
Follow these steps and you’ll get a flawless result the very first time. Each step has a “why” so you understand the logic — and can adapt if needed.
Step 1: Preheat & Prep (5 Minutes)
Preheat your oven to 375°F (190°C). Grease a 9×13 inch baking dish. Mix your dry seasonings — garlic powder, onion powder, smoked paprika, dried thyme, salt, and pepper — in a small bowl. Pat your chicken completely dry with paper towels. Moisture is the enemy of a good sear and a crispy skin.
Step 2: Season the Chicken Generously
Rub the seasoning mixture all over each piece of chicken — under the skin if you can manage it, on top, and on the bottom. Don’t be timid here. This chicken is about to flavor the entire dish. Under-seasoned chicken = under-seasoned rice. The math is simple.
Step 3: The Essential Pre-Sear (4–5 Minutes)
Heat butter in an oven-safe skillet or directly in your baking dish on the stovetop over medium-high heat. Place chicken skin-side down and don’t touch it for 4 minutes. You’re not cooking it through — you’re building color, rendering the fat, and creating flavor on the pan surface. Flip briefly (30 seconds) and set aside.
Step 4: Build the Rice Base (3 Minutes)
In the same pan (don’t clean it — those browned bits are flavor), over medium heat, sauté the diced onion for 2 minutes, then add garlic for 1 minute. Now add the uncooked rice and stir to coat in the aromatics for 60 seconds. This toasting step creates a light starchy shell on each grain that keeps the rice from becoming gluey as it absorbs liquid.
Pour in the chicken broth, cream of chicken soup, and sour cream. Stir until fully combined. Add 1 cup of shredded cheddar and stir through. Taste — it should be well-seasoned, creamy, and fragrant. Season with additional salt and pepper if needed.
Step 5: Assemble the Bake
Transfer the rice mixture to your greased 9×13 baking dish and spread evenly. Place the seared chicken pieces skin-side up on top, nestling them just slightly into the rice so they’re stable but the skin remains above the liquid.
Step 6: The Covered Bake (35 Minutes)
Cover the baking dish tightly with aluminum foil — crimp the edges to seal. Bake at 375°F for 35 minutes. This covered phase is where the rice cooks fully in the steam created by the broth. The foil traps every bit of moisture and forces it into the rice. This is not the time for “a little peek.”

Step 7: The Cheese Finale (10–12 Minutes)
Remove the foil. Scatter the remaining 1 cup of cheddar and all of the mozzarella evenly over the top — don’t be stingy, pile it on. Return to the oven, uncovered, for 10–12 minutes until the cheese is fully melted, golden, and starting to bubble at the edges.
Step 8: Rest, Then Serve
Remove from the oven and let the dish rest for 5 full minutes before serving. The rice is still cooking slightly from residual heat, and the sauce is tightening up. If you cut into it immediately, the rice will be looser than ideal. Five minutes = a dramatically better dish.
*As an Amazon Associate, we earn from qualifying purchases.
Pro Tips — The Details That Make a Perfect Cheesy Baked Chicken Rice
🔑 Secret #1: Let the Cheese Come to Room Temperature
Cold cheese, added straight from the fridge to a hot dish, takes longer to melt and can develop a slightly grainy texture as the fats and proteins separate. Let your shredded cheese sit out for 10 minutes while the dish is in its first bake. Room-temp cheese melts silkier, faster, and more evenly.
🔑 Secret #2: Always Shred Your Own Cheese
Pre-shredded cheese in bags contains cellulose and potato starch as anti-caking agents. These prevent proper melting and can give your sauce a slightly gritty texture. A block of sharp cheddar run through a box grater takes 3 extra minutes and the difference in melt quality is genuinely significant.
🔑 Secret #3: The Foil Seal Is Everything
The covered baking phase relies entirely on steam created by the liquid in the dish. If your foil has gaps, steam escapes, the liquid evaporates faster, and the rice can be underdone or unevenly cooked. Crimp the edges of the foil firmly against the lip of the baking dish. This is not optional.
🔑 Secret #4: Don’t Wash the Searing Pan
Every recipe that tells you to “wipe out the pan before building the sauce” is robbing you. All those browned bits from the chicken sear — the fond — are pure concentrated flavor. Deglaze with a splash of broth if needed to loosen them, then build your rice base directly in that pan. You’ll taste the difference.
Variations Worth Making Your Own
🌶️ Spicy Jalapeño Cheesy Chicken Rice
Fold 2 diced jalapeños (seeds removed for moderate heat, seeds in for serious heat) and ½ teaspoon of cayenne into the rice base. Top with pepper jack cheese instead of mozzarella. Add a dollop of sour cream when serving. This version has absolutely no chill — in the best possible way.
🥦 Cheesy Chicken, Broccoli & Rice Bake
Add 2 cups of small broccoli florets to the rice base before baking. The broccoli steams perfectly under the foil and becomes tender without getting mushy. This is the version that makes the dish feel like a complete meal, requiring nothing alongside it.
🍗 Boneless Skinless Chicken Breast Version
If using boneless skinless breasts, reduce the bake time after adding cheese to 8 minutes (breasts cook faster and dry out more easily). Use a meat thermometer to confirm 165°F internal temperature. Also worth adding a tablespoon of olive oil to the seasoning rub to compensate for the lack of skin fat.
🧅 French Onion Cheesy Chicken Rice
Replace the cream of chicken soup with cream of mushroom, add 1 tablespoon of Worcestershire sauce to the base, caramelize the onions for 12 minutes before adding them, and top with Gruyère instead of mozzarella. It tastes like French onion soup decided to become a casserole. You’re welcome.

Serving Suggestions
This casserole is genuinely a complete meal on its own, but the right sides take it from dinner to occasion.
- Simple green salad — The richness of the cheese sauce craves something fresh and acidic. A crisp arugula salad with lemon vinaigrette is perfect balance.
- Steamed green beans or roasted asparagus — Minimal effort, maximum elegance. Roast asparagus at 425°F for 10 minutes on a sheet pan while the casserole is in its final bake.
- Crusty bread or garlic bread — You will want something to drag through the sauce at the bottom of the dish. This is non-negotiable for me personally.
- Coleslaw — The cool, creamy crunch of coleslaw alongside the hot, cheesy casserole is a textural contrast that just works.
Storage, Reheating & Meal Prep Guide
This casserole was practically designed for meal prep. It holds beautifully and, many people argue (I’m one of them), tastes even better the next day.
- Refrigerator: Store covered or in airtight containers for up to 4 days. The flavors deepen overnight.
- Freezer: Cool completely, then store in freezer-safe containers for up to 3 months. Thaw overnight in the refrigerator before reheating.
- Reheating individual portions: Add 1–2 tablespoons of chicken broth or water to the container before microwaving — this re-steams the rice and prevents it from drying out. Microwave at 70% power in 90-second intervals.
- Reheating the whole dish: Cover with foil and warm in a 325°F oven for 20 minutes, then uncover for 5 minutes to re-crisp the cheese top.
*As an Amazon Associate, we earn from qualifying purchases.
The Comfort Food Science: Why Cheesy Baked Dishes Make Us Feel Better
There’s actual food science behind why a dish like this hits differently than, say, a salad after a hard day. And no, it’s not just about the calories.
According to research published on Serious Eats’ Food Science Lab, the Maillard reaction — the browning that occurs when protein and sugars are exposed to high heat — creates hundreds of new flavor compounds simultaneously. The golden cheese crust on top of this casserole, the caramelized chicken skin, the slightly toasted rice base — they’re all Maillard in action. Those complex, savory, slightly sweet flavor notes are literally hardwired to trigger positive emotional responses. Comfort food is, in a very real sense, chemistry.
This is also why that pre-sear step on the chicken and the cheese broiling at the end aren’t just about aesthetics — they’re about triggering a cascade of flavor-enhancing reactions that make the finished dish taste dramatically more complex and satisfying than its simple ingredient list suggests.
📋 Printable Recipe Card
Ingredients
- 6 bone-in, skin-on chicken thighs
- 1½ cups long-grain white rice, uncooked
- 2¾ cups chicken broth (low-sodium preferred)
- 1 can (10.5 oz) cream of chicken soup
- 1 cup full-fat sour cream
- 2 cups sharp cheddar, freshly shredded & divided
- 1 cup low-moisture mozzarella, shredded
- 1 medium onion, finely diced
- 4 garlic cloves, minced
- 2 tbsp unsalted butter
- 1 tsp garlic powder
- 1 tsp onion powder
- 1 tsp smoked paprika
- 1 tsp dried thyme
- Salt & freshly cracked black pepper to taste
- Fresh flat-leaf parsley, chopped (garnish)
Instructions
- Preheat & prep: Preheat oven to 375°F (190°C). Grease a 9×13 baking dish. Pat chicken completely dry.
- Season: Mix garlic powder, onion powder, smoked paprika, thyme, salt, and pepper. Rub generously over all chicken pieces, including under the skin.
- Sear: Melt butter in an oven-safe skillet over medium-high heat. Place chicken skin-side down and sear 4 minutes undisturbed until golden. Flip for 30 seconds. Set chicken aside — do not cook through.
- Build rice base: In the same skillet over medium heat, sauté onion 2 minutes. Add garlic, 1 minute. Add uncooked rice, stir to coat for 60 seconds. Add broth, cream of chicken soup, sour cream, and 1 cup shredded cheddar. Stir until fully combined. Season to taste.
- Assemble: Pour rice mixture into greased baking dish. Spread evenly. Place chicken skin-side up on top, nestling slightly into the rice.
- Covered bake: Cover tightly with foil, crimping edges to seal. Bake 35 minutes.
- Add cheese: Remove foil. Top with remaining 1 cup cheddar and all mozzarella. Bake uncovered 10–12 minutes until cheese is melted and golden. For a deeper golden crust, broil on medium for 90 seconds at the very end — watch closely.
- Rest & serve: Rest 5 minutes. Garnish with fresh parsley. Serve directly from the dish.
Nutrition (per serving)
*As an Amazon Associate, we earn from qualifying purchases. Prices subject to change.
Frequently Asked Questions
Do not use instant rice — it will turn to paste because it’s pre-cooked and can’t absorb the full 45-minute baking without disintegrating. Brown rice can work but requires an additional ½ cup of broth and 15–20 extra minutes of covered bake time, as it takes much longer to cook. Long-grain white rice is the ideal choice for texture and timing.
Two most likely causes: (1) The foil seal had gaps, allowing steam to escape during the covered bake. Crimp the edges firmly. (2) Your oven runs cool — ovens can vary by 25–50°F from their stated temperature. If the rice is underdone after 35 minutes covered, add ¼ cup more hot broth, re-seal, and bake another 10 minutes. Consider using an oven thermometer to know your oven’s true temperature.
Yes — and it’s one of the best make-ahead casseroles there is. Assemble the dish completely (including placing the chicken), cover with foil, and refrigerate up to 24 hours before baking. Add 5–8 extra minutes to the covered bake since you’re starting from cold. The flavors actually deepen after a night in the fridge — many people say the day-after reheated version is even better than fresh.
Yes. Make a quick substitute: melt 2 tablespoons of butter, whisk in 2 tablespoons of flour for 1 minute, slowly add ¾ cup of whole milk whisking constantly until thick, then season with salt, pepper, and garlic powder. Alternatively, cream of mushroom soup works equally well and adds an earthy depth that some people prefer. Cream of celery is another good option.
Sharp cheddar in the base (for flavor depth and savory punch) combined with low-moisture mozzarella on top (for stretch and browning) is the combination that consistently produces the best result. Other great tops: Gruyère (for a more sophisticated, nutty flavor), Pepper Jack (for heat), or a pre-made Mexican blend (for a Tex-Mex variation). Avoid fresh mozzarella on top — the water content prevents browning.
The safest and most accurate method is an instant-read thermometer inserted into the thickest part of the thigh, away from the bone — you’re looking for 165°F (74°C). Visual cues: the juices should run clear (not pink) when the chicken is pierced, and the meat should pull easily from the bone. Bone-in thighs at 375°F for 45 minutes total almost always hit this mark reliably.
Final Words — Make This. Tonight If Possible.
Cheesy baked chicken rice is the kind of recipe that earns a permanent spot in your rotation. Not because it’s trendy. Not because it photographs well (though it absolutely does). But because it delivers, every single time, without requiring you to be a chef, without requiring expensive ingredients, and without requiring more than about 15 minutes of active work from you.
The oven does the heavy lifting. You get the credit. That’s the deal — and I think it’s an excellent one.
Make it for your family on a weeknight and watch the plates come back empty. Make it for a dinner party and watch people subtly try to figure out how much effort it took. Make a double batch on Sunday and have your meal prep handled for the week.
When you do make it — leave a star rating below, share your variation in the comments, and if you take photos, tag us on Pinterest or Instagram. A golden cheese crust this good deserves an audience.